

When considering installing a solar panel system, one of the key components to consider is the solar inverter. The solar inverter is responsible for converting the direct current (DC) generated by the solar panels into the alternating current (AC) that can be used to power household appliances. Understanding the cost of solar inverters is essential in determining the overall investment required for your solar panel system.
The average cost of a solar inverter in Kenya typically ranges from $1,500 to $3,000 for a medium-sized solar panel system. However, it’s important to note that the specific price will depend on several factors, including the size and efficiency of the system, the type of solar inverter, and the warranty provided. To make an informed decision and find the best deal, it’s crucial to compare prices and consider different options.
- Comparing solar inverter prices is essential for making an informed decision.
- The average cost of a solar inverter in Kenya is around $1,500 to $3,000.
- Factors such as system size, efficiency, and type of inverter affect the overall cost.
- It’s important to consider specific needs and requirements when comparing prices.
- By comparing costs, you can find the best deal for your solar panel system.
Average Solar Inverter Cost
When considering transitioning to solar energy, it’s important to have a clear understanding of the cost involved. The average cost of a solar inverter, which is a vital component of the solar panel system, falls within the range of $1,500 to $3,000. It’s worth noting that the cost of the solar inverter typically accounts for about 6% to 9% of the total cost of the entire solar system.
The total cost of a solar inverter can be influenced by several factors:
- The size of your solar panel system: Larger systems may require more powerful inverters, which can contribute to a higher overall cost.
- The efficiency of the solar inverter: Higher efficiency inverters are generally more expensive, but they can generate more electricity from the same amount of sunlight, resulting in potential long-term savings.
- The type of solar inverter: Different types of inverters, such as string inverters, microinverters, and hybrid inverters, have varying price ranges. Each type has its own advantages and considerations, which should be taken into account when making a purchasing decision.
Additionally, government incentives can help offset the cost of a solar inverter. One such incentive is the federal residential solar energy tax credit, which allows you to claim a percentage of the cost of your solar system, including the inverter, as a credit on your federal income taxes.
It’s important to remember that while the initial cost of a solar inverter may be an investment, the long-term benefits of using solar energy, such as reduced energy bills and a smaller carbon footprint, can outweigh the upfront expense.
Comparing Solar Inverter Costs
Let’s explore a comparison of the average solar inverter costs:
| Type of Inverter | Average Cost Range |
|---|---|
| String Inverter | $1,500 – $2,500 |
| Microinverter | $2,000 – $3,000 |
| Hybrid Inverter | $2,500 – $3,500 |
Comparison of Average Solar Inverter Costs
It’s important to note that the above costs are approximate ranges and can vary depending on several factors, as mentioned earlier. By carefully considering these factors and conducting thorough research, you can make an informed decision when choosing the right solar inverter for your specific needs and budget.
Types of Solar Inverters
When it comes to solar inverters, there are several types to choose from, each with its own unique features and benefits. Understanding the differences between these inverters can help you make an informed decision for your solar panel system. The three main types of solar inverters are:
1. String Inverter
The string inverter is a popular and cost-effective option for solar panel systems. It is designed to connect multiple panels together in a series, converting the direct current (DC) produced by the panels into alternating current (AC) for use in your home.
This type of inverter is installed near the electrical panel and can handle a large number of panels. However, it is important to note that the performance of the entire system is dependent on the weakest panel in the string. So, if one panel is shaded or underperforming, it can impact the output of the entire string.
2. Microinverter
A microinverter is a smaller, more independent option that offers advantages in terms of panel-level optimization. Unlike string inverters, microinverters are installed on individual solar panels, converting DC to AC power at the panel level. This means that each panel operates independently and is not affected by the performance of other panels.
Microinverters are known for their ability to maximize energy production, especially in situations where panels may be shaded or experiencing different levels of sunlight. They also offer monitoring capabilities and can help identify any issues with specific panels.
3. Hybrid Inverter
A hybrid inverter is a versatile option that combines the functionalities of a solar panel inverter and a battery inverter. It allows you to connect your solar panel system to a battery storage system, enabling you to store excess energy for later use. This can help increase energy independence and reduce reliance on the grid, especially during times of high electricity demand or power outages.
Hybrid inverters are typically more expensive than string or microinverters due to their additional functionality and capability to integrate with battery systems. However, they offer the benefit of backup power and increased flexibility for homeowners.
Choosing the right type of inverter depends on various factors, including your specific energy needs, budget, and the layout of your solar panel system. It is essential to consult with a professional solar installer who can assess your requirements and recommend the best inverter option for you.

| Type of Solar Inverter | Advantages | Considerations |
|---|---|---|
| String Inverter |
|
|
| Microinverter |
|
|
| Hybrid Inverter |
|
|
Factors Affecting Solar Inverter Costs
When considering the cost of a solar inverter, several factors come into play. These factors include the size of the system, the efficiency of the inverter, and the addition of a power optimizer. Let’s take a closer look at each of these factors:
- System Size: The size of your solar panel system can impact the cost of the inverter. Larger systems generally require more powerful inverters, which can be more expensive.
- Inverter Efficiency: The efficiency of the inverter refers to how well it converts the direct current (DC) produced by the solar panels into usable alternating current (AC) electricity. Higher efficiency inverters are often priced at a premium.
- Power Optimizer: A power optimizer is a device that can be added to a string inverter system to improve the performance of individual solar panels. While power optimizers can enhance the overall system efficiency, they can also add to the cost of the system.
In general, larger systems and more efficient inverters will have higher costs. Additionally, the inclusion of a power optimizer in a string inverter system can increase the overall system cost. It’s important to consider these factors when comparing prices and choosing the right inverter for your solar panel system.
Optimizing the cost and performance of your solar inverter is crucial for a successful solar installation. To help you better understand the factors affecting solar inverter costs, here’s a detailed breakdown:
| Factor | Affected Cost |
|---|---|
| System Size | Inverter cost increases with larger system sizes. |
| Inverter Efficiency | Higher efficiency inverters generally come at a higher cost. |
| Power Optimizer | Adding a power optimizer can increase the overall system cost. |
To illustrate the impact of these factors on the cost, consider the following example: A larger solar panel system with high-efficiency inverters and power optimizers will likely have a higher overall cost compared to a smaller system with standard inverters. It’s essential to strike a balance between system requirements, desired performance, and budget.
It’s worth noting that the cost of a solar inverter is an investment in the overall performance and efficiency of your solar panel system. Investing in a reliable and efficient inverter can contribute to long-term energy savings and maximize the return on your solar investment.
Up next, we’ll explore the benefits of DIY versus professional solar inverter installation and help you make an informed decision.

DIY vs. Professional Solar Inverter Installation
When it comes to installing a solar inverter, you have the option to do it yourself (DIY) or hire a professional. Both options have their advantages and considerations, so it’s essential to weigh your skills, resources, and the complexity of the installation.
DIY solar inverter installation can be an attractive choice for those who are confident in their technical abilities and have experience with electrical work. It allows you to save on installation labor costs and have more control over the installation process. However, it’s crucial to note that DIY installation requires a strong understanding of electrical systems, safety protocols, and compliance with local regulations.
On the other hand, hiring a professional solar inverter installer offers several benefits. Professional installers have the knowledge and expertise to handle the installation efficiently and safely. They are familiar with local building codes and regulations, ensuring that your system meets all requirements. Furthermore, professional installers often have access to bulk discounts on high-quality components, which can result in cost savings. Additionally, they provide warranties and offer ongoing support and maintenance services.
While DIY installation may save on installation labor costs, it’s worth considering that professional installers can often secure better deals on the actual solar inverters due to their industry connections. These savings can offset the additional cost of professional installation. Moreover, professional installers can provide peace of mind, knowing that the installation is done correctly and in accordance with the highest safety standards.
Ultimately, the decision between DIY and professional solar inverter installation depends on your level of expertise, the complexity of the installation, and your willingness to take on the responsibility. If you have the necessary skills and are comfortable with handling electrical work, DIY installation can be a viable option. However, if you prefer the assurance and convenience of a professional installation, it’s advisable to hire an experienced solar inverter installer.
Benefits of DIY Solar Inverter Installation:
- Cost savings on installation labor
- Control over the installation process
- Flexibility in timing the installation
Benefits of Professional Solar Inverter Installation:
- Expertise and knowledge of professional installers
- Access to bulk discounts on components
- Compliance with local regulations and building codes
- Warranty coverage and ongoing support
“While DIY installation may save on installation labor costs, it’s worth considering that professional installers can often secure better deals on the actual solar inverters due to their industry connections.”
| DIY Solar Inverter Installation | Professional Solar Inverter Installation |
|---|---|
| Cost savings on installation labor | Knowledge and expertise of professional installers |
| Flexibility in timing the installation | Access to bulk discounts on components |
| Increased involvement and control over the process | Compliance with local regulations and building codes |
| Warranty coverage and ongoing support |
Consider your skills, resources, and the complexity of the installation when deciding between DIY and professional solar inverter installation.
Solar Inverter Warranty
When purchasing a solar inverter, it’s essential to consider the warranty coverage and length provided by the manufacturer. Solar inverters typically come with warranties ranging from 5 to 25 years, depending on the type and manufacturer.
String inverters, which connect multiple panels together, typically have warranties of 5 to 10 years. On the other hand, microinverters, which connect to individual panels and operate independently, often come with warranties of up to 25 years. It’s important to review the warranty terms and conditions to ensure they align with your expectations and provide sufficient protection for your investment.
Having a warranty in place offers peace of mind as it ensures that you are protected against potential defects or issues with your solar inverter within the specified warranty period. In the event of any malfunctions or failures, the manufacturer will typically provide repair or replacement services free of charge.
Before making a purchase, carefully review the warranty coverage for your chosen solar inverter, paying attention to factors such as the coverage period, any limitations or exclusions, and the process for filing warranty claims. Understanding the warranty terms will help you make an informed decision and choose an inverter that provides adequate protection for your solar panel system.
Advantages of a Comprehensive Inverter Warranty
An extensive warranty coverage for your solar inverter offers several benefits:
- Peace of mind: A robust warranty provides assurance that your solar inverter is protected against any manufacturing defects or failures, allowing you to enjoy the benefits of your solar panel system with minimum worries.
- Long-term cost savings: With a lengthy warranty, you can avoid unexpected repair or replacement costs during the warranty period, potentially saving you significant expenses.
- Increased system reliability: A reliable warranty signifies the manufacturer’s confidence in the quality and performance of their product, giving you confidence that your solar inverter will consistently operate at its best.
Investing in a solar inverter with a comprehensive warranty not only safeguards your system but also provides you with the reassurance that you are getting a high-quality and reliable product from a trusted manufacturer.

Solar Inverter Installation Process
Installing a solar inverter involves a step-by-step process to ensure optimal performance and functionality. Here’s a breakdown of the solar inverter installation process:
- Site Assessment and System Design: A qualified solar contractor will conduct a thorough assessment of your property to determine the best location for the solar panels and inverter. They will assess factors like sun exposure, shading, and available roof space. Based on the assessment, a system design will be created, outlining the number and placement of solar panels, as well as the appropriate inverter for your solar panel system.
- Obtaining Permits: Before the installation can begin, permits must be obtained from the local authorities. The solar contractor will handle the necessary paperwork and ensure compliance with building codes and regulations.
- Solar Panel Mounting: The solar panels will be mounted on your roof or another suitable location. The contractor will ensure proper alignment and secure the panels to withstand weather conditions.
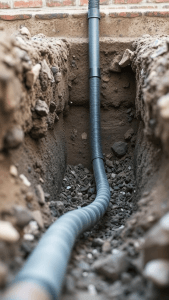
- Inverter Installation: Once the solar panels are securely mounted, the inverter will be installed. The inverter converts the direct current (DC) produced by the solar panels into alternating current (AC) for use in your home. The positioning of the inverter is important to minimize energy loss and optimize performance.
- Connection to Panels and Electrical System: The inverter will be connected to the solar panels through wiring. This connection enables the inverter to receive the DC electricity generated by the panels. Additionally, the inverter will be connected to the electrical system of your home, allowing the AC electricity to power your appliances and devices.
- Testing and Commissioning: Once the installation is complete, the entire solar panel system, including the inverter, will be thoroughly tested to ensure proper functionality. The contractor will check for any issues or malfunctions and make any necessary adjustments.
It’s important to hire a qualified and experienced solar contractor to handle the installation process. They have the expertise and knowledge to ensure that your solar inverter is installed correctly and safely, maximizing the efficiency and performance of your solar panel system.
| Installation Step | Description |
|---|---|
| Site Assessment and System Design | A qualified solar contractor assesses the property and designs a system based on sun exposure, shading, and available roof space. |
| Obtaining Permits | The contractor obtains the necessary permits from local authorities to ensure compliance with building codes and regulations. |
| Solar Panel Mounting | The solar panels are securely mounted on the roof or another suitable location to optimize sun exposure. |
| Inverter Installation | The inverter is installed, converting the DC electricity produced by the solar panels into AC electricity for use in your home. |
| Connection to Panels and Electrical System | The inverter is connected to the solar panels and the electrical system of your home, allowing for the proper flow of electricity. |
| Testing and Commissioning | The entire solar panel system, including the inverter, is thoroughly tested to ensure proper functionality and performance. |

Tips for Choosing a Solar Inverter Contractor
When it comes to installing a solar inverter, choosing the right contractor is crucial for a successful and efficient system. Here are some essential tips to help you make an informed decision:
- Experience: Look for solar inverter contractors with extensive experience in the industry. Companies that have been in business for a long time have likely gained valuable knowledge and expertise.
- Certifications and References: Verify if the contractor has relevant certifications and licenses. Additionally, ask for references from previous customers to get a better understanding of their work quality and reliability.
- Industry Affiliations: Contractors who are members of reputable industry organizations like the Solar Energy Industries Association (SEIA) showcase their commitment to professionalism and adherence to industry standards.
- Customer Feedback: Take the time to review customer feedback and ratings for the contractor. You can find testimonials and reviews on their website or reputable review platforms to gauge their customer satisfaction levels.
- Multiple Estimates: Don’t hesitate to request estimates from multiple contractors. Comparing quotes will give you an idea of the price range and help you make an informed decision.
- Licensing, Bonding, and Insurance: Ensure that the solar inverter contractor you choose is licensed, bonded, and insured. This protects both you and the contractor in the event of any accidents or damages during the installation process.
- Contract and Warranty: Before starting any work, make sure to have a detailed contract that clearly outlines the scope of the project, timelines, and payment terms. Additionally, confirm that the contractor provides a warranty for their workmanship and the solar inverter itself.
By taking these tips into consideration, you can find a reliable and skilled solar inverter contractor who will ensure the smooth installation and efficient operation of your solar panel system.

Solar Inverter Troubleshooting and Maintenance
Solar inverters are essential components of a solar panel system, converting the direct current (DC) generated by the panels into alternating current (AC) for use in our homes. To ensure the optimal performance and longevity of your solar inverter, occasional troubleshooting and regular maintenance are necessary.
Common Issues and Troubleshooting
Despite their reliability, solar inverters may encounter occasional faults or errors. Some common issues that may arise include:
- Poor connection between the solar panels and the inverter
- Fault codes or error messages displayed on the inverter
- Intermittent power output or fluctuations
If you experience any of these issues, it is important to consult the manufacturer’s guidelines and troubleshooting resources. Manufacturers often provide detailed instructions on diagnosing and resolving common problems. Alternatively, you can seek assistance from a professional solar technician who has expertise in solar inverter troubleshooting.
Maintenance Tips for Optimal Performance
Regular maintenance can help identify potential issues early on, maximizing the performance and lifespan of your solar inverter. Here are some maintenance tips to follow:
- Inspect and clean solar panels: Regularly inspect your solar panels for any dirt, debris, or shading that may affect performance. Cleaning them with a soft brush or hose can help ensure maximum sunlight absorption.
- Monitor system performance: Keep track of your system’s performance by monitoring the energy production and any fluctuations. If you notice any significant drops in output, it may indicate an issue that requires attention.
- Verify connections: Check the connections between the solar panels and the inverter to ensure they are secure and free from corrosion. Any loose or damaged connections should be addressed promptly.
- Maintain optimal environmental conditions: Ensure that the area surrounding your solar panels is clear of obstructions and that there is proper ventilation around the inverter. Extreme temperatures, excessive humidity, or exposure to direct sunlight can impact the inverter’s performance.
By following these maintenance practices, you can minimize the risk of potential issues and maximize the efficiency and lifespan of your solar inverter.

Quote:
I have found that regular maintenance and monitoring are key to ensuring the optimal performance of solar inverters. By following the manufacturer’s guidelines and addressing any issues promptly, we can maximize energy production and prolong the lifespan of the inverter.” – Jane Smith, Solar Panel System Owner
Solar Inverter Lifespan
When it comes to the lifespan of a solar inverter, several factors come into play, such as the type and quality of the inverter, environmental conditions, and maintenance practices.
Typically, string inverters have a lifespan of 10 to 15 years, while microinverters can last anywhere from 15 to 25 years. Choosing a reputable brand and properly maintaining your solar inverter can help maximize its longevity.
Environmental conditions, such as extreme temperatures, humidity, and exposure to dust or debris, can affect the lifespan of your solar inverter. It’s important to install the inverter in a well-ventilated area and regularly inspect it for any signs of damage or deterioration.
Maintenance practices also play a vital role in prolonging the life of your solar inverter. Regular cleaning of the panels to remove dirt and debris can help prevent overheating and ensure optimal performance. Additionally, scheduling routine inspections by a qualified professional can help identify and address any potential issues early on.
Choosing a reputable brand for your solar inverter is essential, as it ensures that you are investing in a reliable and durable product. Look for manufacturers that have a proven track record and offer comprehensive warranties to protect your investment.
Key Factors Affecting Solar Inverter Lifespan:
- Quality of the inverter
- Environmental conditions
- Maintenance practices
| Type of Inverter | Lifespan |
|---|---|
| String Inverter | 10 to 15 years |
| Microinverter | 15 to 25 years |
Solar Clipping and Overloading
Solar clipping and overloading are important considerations when it comes to the performance and safety of a solar panel system. Understanding these concepts can help you optimize your system and prevent any potential issues.
Solar Clipping
Solar clipping occurs when the amount of electricity generated by solar panels exceeds the input-wattage rating of the inverter. This typically happens in string inverter systems, where the maximum output is almost never reached in real-world conditions. Solar clipping is considered safe and does not pose a threat to your system.
“Solar clipping, although it may sound concerning, is actually a normal occurrence in most solar panel systems. It happens when the system’s capacity exceeds the average usage and the maximum output of the inverter. This leads to a small portion of the electricity being unused, resulting in clipping. It’s important to note that the level of clipping in a system is usually minimal and does not significantly affect overall system performance.” – John Anderson, Solar Expert
Solar Inverter Overloading
Solar inverter overloading, on the other hand, can occur when the solar panel system generates more electricity than the inverter is rated for. This can lead to reduced efficiency, increased wear and tear on the inverter, and potential damage to the system. It’s crucial to properly size the inverter to match the output potential of your solar panel system.
“To avoid overloading your solar inverter, it’s recommended to choose an inverter with a lower wattage rating than the maximum output of your solar panels. This ensures that the inverter can handle the load without compromising its performance or lifespan. Consulting with a professional solar installer can help you determine the appropriate inverter size for your system.” – Emily Patel, Renewable Energy Specialist
Solar Panel System Overloading
Solar panel system overloading refers to the situation when the total electrical output of the system exceeds the capacity of the inverter. This can lead to issues such as excessive heat generation, reduced efficiency, and potential damage to the solar panels and other components. It is important to design and install a system that is properly balanced and can handle the maximum output of the solar panels.
To avoid solar panel system overloading, it is crucial to properly size the inverter and ensure that it can handle the maximum output of the solar panels. Additionally, regular monitoring of the system’s performance and consulting with a qualified solar professional can help identify any potential overloading issues and address them promptly.
| Issue | Causes | Potential Consequences |
|---|---|---|
| Solar Clipping | Exceeding inverter’s input-wattage rating | Negligible impact on system performance |
| Solar Inverter Overloading | Inverter not properly sized for the system | Reduced efficiency, increased wear and tear, potential system damage |
| Solar Panel System Overloading | Total system output exceeds inverter capacity | Excessive heat generation, reduced efficiency, potential component damage |
Conclusion
Solar inverters are an essential component of any solar panel system as they convert the direct current produced by the panels into the alternating current required for household use. When considering the cost of a solar inverter, it is important to take into account various factors such as the size of the system, the type and efficiency of the inverter, and the overall installation process.
In order to make an informed decision, it is advisable to work with a reputable solar inverter contractor who can provide expert guidance and help you select the right inverter for your specific needs. Regular monitoring, troubleshooting, and maintenance are also crucial for maximizing the lifespan and performance of your solar inverter.
By carefully considering all these factors and working with professionals, you can ensure that your solar panel system operates efficiently and effectively, providing clean and sustainable energy for your household. With proper maintenance and monitoring, your solar inverter can deliver long-term benefits, helping you save on energy costs and reduce your carbon footprint.
FAQ
What is the average cost of a solar inverter?
The average cost of a solar inverter is around
FAQ
What is the average cost of a solar inverter?
The average cost of a solar inverter is around $1,500 to $3,000 for a medium-sized solar panel system.
What types of solar inverters are available?
There are three types of solar inverters: string inverters, microinverters, and hybrid inverters.
What factors can impact the cost of a solar inverter?
Factors such as system size, efficiency, and the addition of a power optimizer can influence the cost of a solar inverter.
Should I choose DIY or professional solar inverter installation?
It depends on your level of expertise and the complexity of the installation. DIY installation can save on labor costs but may result in a higher inverter cost.
What is the warranty length for a solar inverter?
Solar inverters typically come with warranties ranging from 5 to 25 years, depending on the type and manufacturer.
What is the solar inverter installation process?
The installation process involves a site assessment, system design, obtaining permits, mounting panels, and connecting the inverter to the electrical system.
How do I choose a solar inverter contractor?
Consider their experience, certifications, references, and membership in industry organizations such as the Solar Energy Industries Association (SEIA).
What troubleshooting and maintenance does a solar inverter require?
Common issues include faults, errors, and poor connections. Consult the manufacturer’s guidelines and seek professional assistance if needed. Regular maintenance is also recommended.
How long do solar inverters last?
The lifespan of a solar inverter can vary but is typically around 10 to 25 years, depending on the type and quality of the inverter.
What is solar clipping and overloading?
Solar clipping occurs when the amount of electricity generated exceeds the input-wattage rating of the inverter. Overloading can be avoided by properly sizing the inverter to match the panel system’s output potential.
What should I consider when choosing a solar inverter?
Factors such as system size, efficiency, warranty, and installation cost should be considered when choosing a solar inverter.
,500 to ,000 for a medium-sized solar panel system.
What types of solar inverters are available?
There are three types of solar inverters: string inverters, microinverters, and hybrid inverters.
What factors can impact the cost of a solar inverter?
Factors such as system size, efficiency, and the addition of a power optimizer can influence the cost of a solar inverter.
Should I choose DIY or professional solar inverter installation?
It depends on your level of expertise and the complexity of the installation. DIY installation can save on labor costs but may result in a higher inverter cost.
What is the warranty length for a solar inverter?
Solar inverters typically come with warranties ranging from 5 to 25 years, depending on the type and manufacturer.
What is the solar inverter installation process?
The installation process involves a site assessment, system design, obtaining permits, mounting panels, and connecting the inverter to the electrical system.
How do I choose a solar inverter contractor?
Consider their experience, certifications, references, and membership in industry organizations such as the Solar Energy Industries Association (SEIA).
What troubleshooting and maintenance does a solar inverter require?
Common issues include faults, errors, and poor connections. Consult the manufacturer’s guidelines and seek professional assistance if needed. Regular maintenance is also recommended.
How long do solar inverters last?
The lifespan of a solar inverter can vary but is typically around 10 to 25 years, depending on the type and quality of the inverter.
What is solar clipping and overloading?
Solar clipping occurs when the amount of electricity generated exceeds the input-wattage rating of the inverter. Overloading can be avoided by properly sizing the inverter to match the panel system’s output potential.
What should I consider when choosing a solar inverter?
Factors such as system size, efficiency, warranty, and installation cost should be considered when choosing a solar inverter.
Source Links
- https://homeguide.com/costs/solar-inverter-cost
- https://www.solarelectricsupply.com/residential-solar-system-cost
- https://www.solarquotes.com.au/inverters/compare/
Ready to discover your solar potential?
Our calculator shows you exact savings projections for your home.


Leave a Comment
Your email address will not be published. Required fields are marked *